Tuesday, December 31, 2013

Bulleit Rye Ice Cream

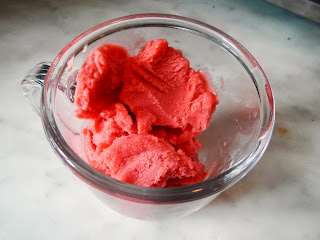
Because the bourbon ice cream came out so well, I had a request for more.  Of course I can't leave well enough alone, so I tried it with rye this time instead.  It's similar, but I miss some of the smoky vanilla from the Woodford Reserve bourbon that I used before.

In this one, I used different stabilizers from last time.  I think I actually went too far with it because this ice cream is very soft, like beyond soft-serve.  The combination of the alcohol and the stabilizers have lowered the freezing point to beyond what our freezer is capable of firming up.  I think this could be fixed just by cutting back on the xanthan gum, but it could also be due to a different alcohol content in the rye.  People who get serious about their ice cream chemistry seem to control the hardness by varying the types of sugar between dextrose, sucrose (white table sugar) and glucose or inverted sugar syrup.  I'm not very familiar with all of those options yet, relying on some basic corn syrup to prevent ice crystals and keep things smooth.  (Possibly too smooth?  People always complain about icy homemade ice cream but this has never happened to me when using corn syrup.  I might dial it back a bit to get the ice cream to feel colder and drier.)

I also did something the recipes all tell you never to do, which is put the hot ice cream base straight into the machine to freeze.  Resting the base overnight in the fridge is preferable, since it gives it a chance to thicken.  This also makes it take longer to churn, although I still didn't get any ice crystals, which is the big danger there.

BTW, I've been experimenting with different thickeners and have found that arrowroot seems to be add less flavor and color than cornstarch, so I've switched to it now.  There are warn not to use arrowroot with dairy because it will get "slimy", but I haven't seen any evidence of this.  My best guess is that it's an issue with the butterfat in full-fat dairy and not with the low-fat stuff I'm using.  Or else The Internet is just wrong.

Here's the recipe for this one:

Bulleit Rye Ice Cream Recipe

NOTES: This came out too soft.  I think that cutting back on the xanthan gum and maybe replacing some corn syrup with sugar.

Ingredients

  • 3 cups fat free half and half
  • 1/3 cup sugar
  • 1/3 cup corn syrup
  • 1/4 tsp salt
  • 2 tbsps arrowroot
  • 1/4 cup rye
  • 1/2 tsp xanthan gum
  • 1/4 tsp guar gum

Instructions

  1. Mix about 1/4 cup half-and-half with arrowroot, gums, and salt in a small bowl to make a slurry.
  2. Put half-and-half, sugar, and corn syrup in a saucepan.  Bring to a rolling boil and then allow to boil for 4 minutes.
  3. Lower heat, add slurry, and whisk vigorously to combine.
  4. Heat, whisking frequently, until it thickens up.
  5. Optionally, blend in a blender to disperse gums well.  Be careful about blending hot liquids!
  6. What you should do at this point is let it cool overnight in the fridge, even though I didn't do that.
  7. Freeze in an ice cream maker.

Wednesday, August 28, 2013

Vietnamese Coffee Ice Cream

This may be the simplest recipe for ice cream I've made, and yet it was one of the most successful.  It's based on a recipe from The Perfect Scoop, with the amounts adjusted to match the size of the condesnsed milk can I had, and a little xanthan gum added.  The condensed milk might do such a good job on its own of supressing ice crystals that the xanthan gum is superfluous in this recipe.  It's soft and scoopable straight out of the freezer.

I let the mix churn for a full 45 minutes because I'm trying to increase overrun, but it didn't seem to matter.  The ice cream is dense and kind of "wet" (is that what they mean by "soggy" in ice cream science books?), and the meltdown is too quick and too liquid.  It needs more emulsifier so it can hold more air.  I did like the chewiness of it though.  Also, even though it's delicious, I think the flavor is too intense.  I'd increase the proportion of half and half next time.

Vietnamese Ice Cream Recipe

Ingredients

  • 1 cup fat free sweetened condensed milk
  • 1 cup strong coffee or espresso (I used my Aeropress)
  • 1/3 cup fat free half and half
  • 1/4 tsp xanthan gum

Instructions

  1. Mix everything in a blender.
  2. Put in the refrigerator to sit overnight.
  3. Freeze in an ice cream maker.

Monday, August 19, 2013

Mint Stracciatella (Chocolate Chip)

After a bad experience with large chocolate chips in a mint chocolate chip batch, I tried making one with fudge ripple instead.  However, the David Lebovitz fudge ripple recipe is not very good and no one liked it much in the ice cream.  So, I decided to try a different tactic and do what Italian gelato makers call stracciatella, where you drip melted chocolate into the nearly frozen ice cream while the machine is running.  This worked out great!  Lots of little chocolate bits in every bite, and no big frozen chunks to break your teeth on.  I think I will always do chocolate chip this way from now on.

Also, since things taste mintier when they're green, I added a few drops of green food coloring.  Beautiful!

Mint Stracciatella Recipe

Ingredients

  • 3 cups low fat half-and-half
  • 1/2 cup sugar
  • 1/3 cup corn syrup
  • 1/4 tsp salt
  • 2 tbsps cornstarch
  • 4 tbsps (2 oz) cream cheese
  • 1/2 tsp xanthan gum
  • big bunch of mint leaves, washed (you can leave them on the stems)
  • a few drops of green food coloring
  • 3 oz bittersweet chocolate

Instructions

  1. Put cream cheese and salt in a larger bowl and set it aside to soften up.
  2. Mix about 1/4 cup half-and-half with cornstarch in a small bowl until fully dissolved.  Set aside.
  3. Whisk remaining half-and-half, sugar, and corn syrup in a saucepan.  Bring to a rolling boil and then allow to boil for 4 minutes.
  4. Add mint and remove from heat. Allow to steep for 30 minutes.
  5. Strain to remove mint and then return to pot.
  6. Add cornstarch slurry while whisking.  Heat, whisking frequently, until it boils.  Mixture should thicken up.
  7. Add xanthan gum while whisking.
  8. Pour mixture over cream cheese and whisk to combine. Whisk in food coloring. At this point, if there are lumps, you should put it in a blender and make it smooth.
  9. Pour mixture into a ziploc freezer bag and cool in an ice bath, or put in the refrigerator to sit overnight.
  10. Freeze in an ice cream maker. While ice cream is freezing, melt chocolate, either in a microwave or in a metal bowl over a simmering pot of water. When ice cream is nearly done, drip melted chocolate slowly into the running ice cream maker. Let it run for another minute to freeze and break up the chocolate.

              Saturday, August 17, 2013

              New Equipment!

              Thanks to my ice-cream-loving Grandpa, I have inherited a new ice cream maker.  It's a beauty: an Il Gelataio, self-refrigerated, with a removable bowl that can go in the dishwasher!  Totally revolutionary.

              I decided to test it out with a sorbet.  I started with the Cook's Illustrated recipe, but since I couldn't find Sure Jell low sugar pectin anywhere in my neighborhood (Why does New York City have the worst grocery stores on earth?), I tried using some xanthan gum instead.  Without this, it tends to freeze rock hard and melt too quickly.  I tried 1/8 tsp, then 1/4 tsp, and am currently thinking it needs a full 1/2 tsp to work well.  A tsp of alcohol provides a similar result, but that flavor isn't right for all sorbets.

              The other tricky thing is that you need to not churn it too much.  Unlike ice cream, more overrun is not good here.  It just makes the sorbet hard and crumbly.  I don't think I have this right yet.  The last time I only churned it for 10 minutes and it still seemed to go past the ideal stage, which is like a barely pourable smoothie.

              Raspberry Sorbet Recipe

              Ingredients

              • 1 1/4 lbs raspberries, fresh or frozen
              • 1 cup water
              • 1/8 tsp salt
              • 1/2 cup plus 2 tbsps sugar
              • 1/4 cup corn syrup
              • 1/2 tsp xanthan gum

              Instructions

              1. Mix all ingredients in blender.
              2. Strain to remove seeds.
              3. Freeze in an ice cream maker.

              Thursday, August 15, 2013

              Thai Coconut Ice Cream

              This is a catch-up post from my ice cream activities in Maine.  We tried a Thai coconut flavor of gelato at Maple's in Yarmouth, and it was really good, so I decided to try making something similar.  It's easy to make ice cream using canned full-fat coconut milk, but that stuff will kill you.  I wanted to see if I could make one that was at least a little lighter by using the type of coconut milk that So Delicious makes, which is similar to soy milk.  It's still full of saturated fat, but it's only 70 calories per cup so at least it's less dense.

              To make this into ice cream, I used a combination of guar gum and xanthan gum.  It took a couple of tries to get the amounts right.  My first batch came out pretty icy, although my tasters liked it anyway.

              Thai Coconut Ice Cream Recipe

              Ingredients

              • 3 cups So Delicious coconut milk or equivalent
              • 1/3 cup sugar
              • 1/3 cup corn syrup
              • about an inch of fresh ginger sliced into coins (no need to peel it)
              • juice of one lime
              • 1/4 cup peanut butter
              • 1/8 tsp cayenne pepper
              • 1/4 tsp xanthan gum
              • 1 tsp guar gum

              Instructions

              1. Mix coconut milk, sugar, salt, and corn syrup in saucepan.  Add ginger.  Bring to a boil and boil for four minutes.
              2. Strain into blender to remove ginger.  Add lime juice, peanut butter, cayenne pepper, and gums.  Blend to combine thoroughly.  (Be careful about blending hot liquids!)
              3. Pour into a container and transfer to the refrigerator to sit until cold, a few hours or overnight.
              4. Freeze in an ice cream maker.

              Thursday, July 11, 2013

              Mint Fudge Ripple

              I'm in Maine, so I'm using our trusty old Il Gelataio, a Chanuka gift from Grandpa about 30 years ago.  It still works perfectly!  It has a built in compressor, and it freezes the ice cream much faster and more reliably than my KitchenAid attachment.  It also spins the beater faster and produces a very silky-looking result.

              I decided to try some fresh mint ice cream with the mint in the back yard here.  Last time I did this, I didn't like the big frozen chocolate chips, so I decided to try using a fudge ripple instead.  I also wanted to play around with different thickeners.

              The flavor is good, very minty, although it could actually use a little more sugar.  That's the first time I've felt that way in any of my ice creams.  The texture came out a little funny.  Sort of too soft.  After reading a bit, I think I need to increase the amount of guar gum and reduce the amount of xanthan gum.  Some people suggest as much as a 10:1 ratio, but I will probably start out with 3:1 and see how it goes.

              We had some trouble getting the freezer cold enough initially, so that might have harmed the texture as well.  That's all fixed for next time.

              Mint Fudge Ripple Recipe

              NOTES: This recipe needs some tweaking on the thickener amounts.

              Ingredients

              • 3 cups low fat half-and-half
              • 1/3 cup sugar
              • 1/3 cup corn syrup
              • 1/4 tsp salt
              • 1/4 tsp xanthan gum
              • 1/4 tsp guar gum
              • big bunch of mint leaves, washed and torn into pieces
              • fudge ripple recipe

              Instructions

              1. Mix half-and-half, sugar, salt, and corn syrup in saucepan.  Bring to a boil and boil for four minutes.
              2. Pour into blender, add gums and blend to combine.  (Be careful about blending hot liquids!)
              3. Pour into a container, stir in mint leaves, and transfer to the refrigerator to sit overnight.
              4. Strain mint leaves out, freeze in an ice cream maker.
              5. When transferring to container from ice cream maker, layer in fudge ripple.  Try not to stir, just layer.

              Sunday, June 23, 2013

              Coffee Bourbon Ice Cream and Overrun

              Coffee Bourbon Ice Cream
              I decided to switch back to dairy ice creams for this one.  I used my current standard low-fat ice cream formula but added in a tiny bit of xanthan gum to see how it would affect the texture.  Of course I also used 1/4 of bourbon (Woodford Reserve, since it was only $3 for this amount!), and that probably had more of an effect on the texture than the xanthan gum did.

              My main experiment this time was to try increasing the speed of the beater ("shear strength") to whip more air into the mixture ("overrun").  That failed pretty badly.  I increased the mixer speed one notch and let it go for about 20 minutes, but the mix never took on much volume.  It looked to me like the increased speed prevented it from freezing and without freezing it can't hold the air bubbles.  (Is that crazy?  Maybe the increased volume in my mixes is normally due to ice crystals forming.)

              I finally gave up and ran it at the lowest speed as usual, and then it bulked up as much as it usually does, which is to say not much.  The final result is tasty and smooth, and very soft and scoopable, but still too dense.

              So, what to try next in my quest to increase overrun?  I have two ideas:

              1. Get the mix colder before putting it into the freezer.  I may have chosen badly by doing a flavor with alcohol in it, since that depresses the freezing point already.  If I try a non-booze flavor, and maybe put it in the freezer for 15 minutes before spinning it, it might freeze well even at the higher speed.  Or it might seize up and break my ice cream machine.
              2. Use more thickeners to increase the viscosity of the mix so that it can hold more air bubbles.  I cut back my use of cornstarch a bit because I felt like I could taste it in my vanilla, but I could use more in strong flavors like chocolate and coffee, or switch to a mix of guar gum and xanthan gum so that I use a smaller proportion.

              Coffee Bourbon Ice Cream Recipe

              NOTES: I like to see little flecks of coffee bean in my ice cream, so I just use a fine mesh strainer to remove the coffee grounds.  If you want to get it pristine, use cheesecloth.

              Ingredients

              • 3 cups fat free half and half
              • 1/3 cup sugar
              • 1/3 cup corn syrup
              • 1/4 tsp salt
              • 2 tbsps corn starch
              • 1/4 cup neufchatel (1/3 less fat cream cheese)
              • 1/4 cup coarsely ground coffee
              • 1/4 cup bourbon
              • 1/8 tsp xanthan gum

              Instructions

              1. Mix about 1/4 cup half-and-half with corn starch in a small bowl until fully dissolved.  Set aside.
              2. Put cream cheese in a larger bowl and set it aside to soften up.
              3. Put half-and-half, sugar, corn syrup, and salt in a saucepan.  Bring to a rolling boil and then allow to boil for 4 minutes.
              4. Turn off heat.  Add ground coffee.  Allow to steep for 5 minutes.
              5. Strain mixture to remove coffee grounds.  Return to (clean) pot and add cornstarch slurry while whisking.  Heat, whisking frequently, until it boils.  Mixture should thicken up.
              6. Pour mixture over cream cheese and whisk to combine.  Add bourbon and whisk again.
              7. Pour mixture into a ziploc freezer bag and cool in an ice bath.  (Or pour into any container and allow it to sit until it reaches room temperature if you're not worried about bacteria.)  Put in the refrigerator to sit overnight.
              8. Freeze in an ice cream maker.

              Thursday, June 20, 2013

              Better Living Through Chemistry

              Vegan Green Tea Ice Cream
              OK, now we're getting somewhere!  This last batch was much better.

              In retrospect, I did a number of things wrong with my vegan chocolate ice cream.  In dairy ice cream you're supposed to heat it for a while to denature the whey proteins and improve the smoothness of the finished product.  Jeni's recipe boils the mixture for 4 minutes, while Ice Cream Science suggests an hour!  (Ice Cream Science also suggests a precise temperature to avoid bringing out an eggy flavor, but that's not an issue with the recipes I'm using.)  I only heated mine up to a boil, as suggested in Vegan Scoop.  Do soy proteins denature in the same way?  Maybe not, but it seems likely there is some benefit.

              In addition, the base should be boiled with as few solids and flavor ingredients as possible, party because boiling tends to mute the flavors and partly because it impedes denaturing the proteins.  I dumped everything in before heating my base.  Whoops.  Jeni's book also warns that adding chocolate directly to the base can cause a dry and crumbly texture, but I think this may be less an issue with soy-based mixtures than with dairy.

              I added a few ounces of brewed coffee to it as well, as suggested in Jeni's Darkest Chocolate Ice Cream in The World recipe.  That seems like a big mistake: adding water to my ice cream base!  Most of the steps in making ice cream are about controlling or reducing the water.  In Jeni's recipe the coffee is used to make a chocolate syrup that gets mixed into the base, but it still seems crazy to add water.

              So, for my most recent batch, I addressed many of these mistakes.  I decided to make another vegan flavor.  This time I chose green tea, since it seemed like it would be taste more in context with the soy milk flavor.  I boiled it for 4 minutes with the sugar, and then in a blender I added the matcha, arrowroot, and my new secret ingredient, xanthan gum.  (Using a blender may not be necessary but it was suggested for incorporating xanthan gum on some discussion boards.)

              The base churned up nicely and definitely held more air than the previous recipe.  After freezing, it is very smooth, with no detectable ice crystals, and easy to scoop.  It still seems a little dense to me.  I think I will try increasing the mixer speed (aka "shear strength") to incorporate more air ("overrun"), and maybe cut back the xanthan gum from 1/2 tsp to 1/4 tsp.  It's almost too smooth now.

              Jeni warns that using too much corn syrup can make the ice cream "soggy" but I can't even get my head around what that means, and I haven't noticed an effect like that.

              I think my next experiment will be a test of dairy-based ice cream with the xanthan gum and a faster mixing speed.

              Vegan Green Tea Ice Cream Recipe

              NOTES: I think this was slightly too much matcha.  It's just a little gritty.  Maybe 4 tsps would be better.

              Ingredients

              • 2 cups soy creamer
              • 1 cup soy milk
              • 1/3 cup sugar
              • 1/3 cup corn syrup
              • 1/4 tsp salt
              • 2 tbsps matcha powder
              • 1 tbsp vanilla extract
              • 2 tbsps arrowroot powder
              • 1/2 tsp xanthan gum

              Instructions

              1. Put soy creamer, soy milk, sugar, corn syrup, and salt in a saucepan.  Bring to a boil and then allow to boil for 4 minutes.
              2. Transfer to a blender.  Add matcha and vanilla extract and blend to combine.  Add arrowroot and blend.  Add xanthan gum and blend.  (Be very careful about blending hot liquids!  I keep the small plastic cap off and cover that hole with a dish towel so that it's not air tight.  That prevents the pressure from building up in the blender.)
              3. Pour mixture into a container.  Let it sit until it reaches room temperature (or put it in an ice bath if you're worried about bacteria) and then put it in the refrigerator overnight.
              4. Freeze in an ice cream maker.

              Sunday, June 16, 2013

              Manifesto

              Hi,

              I started this blog to discuss my efforts to make the kind of ice cream I like at home.  Here are the basics to get you up to speed:

              • I like fluffy, supermarket-style ice cream.  Ideally I like soft-serve, but since I don't expect to be able to make that I am aiming for regular ice cream that's as fluffy and soft as the stuff that used to come in half gallon rectangular containers from Sealtest or Hood (in Maine) when I was little.
              • I don't care about keeping it natural or organic at all.  If chemistry will give me good ice cream, I'm all for it.
              • I need to watch my cholesterol.  Because of this, I am trying to make ice cream using either low-fat dairy or non-dairy (soy, coconut) ingredients.  Fat free half-and-half works surprisingly well.  I'm also using non-egg thickeners like cornstarch and arrowroot because that removes egg yolks from the equation.
              • I use a KitchenAid mixer attachment with my mother's green mixer from 1970 to make my ice cream.

              Vegan Chocolate Ice Cream: FAIL

              I decided to try making a vegan soy-based ice cream.  I received "The Vegan Scoop" as a gift and this was my first try at using the ideas from it.  After reading about the trouble with soy-based ice cream flavors on Ice Cream Geek, I decided to try making an intense chocolate.  I've had good luck with chocolate in the past, even with Alice Medrich's very simple Sicilian Chocolate Gelato recipe, which was my first experience with cornstarch-thickened ice cream.

              The chocolate recipe in The Vegan Scoop didn't look like it had enough chocolate in it to me, so I tried using the amounts from Jeni's "Darkest Chocolate Ice Cream in the World," as well as adding the coffee that she uses.  I followed The Vegan Scoop's suggestions, using a mix of soy milk and soy creamer, with arrowroot for thickening, and used a bit more sugar than I normally like to offset all the cocoa powder.

              The arrowroot seemed to work very well.  I've never seen such a thick and smooth custard from dairy-based ice creams when using similar amounts of cornstarch.  There are warnings all over the Internet to avoid using arrowroot with dairy due to a "slimy" texture, but I may have to try it for myself some time.

              Unfortunately, the finished product is pretty disappointing.  It's icy and dense, with a distinct soy milk flavor.  Not what I was after at all.  It's edible, but the texture is a real letdown.  I think next time I will try adding a small amount of xanthan gum.  Soy milk is known to have problems holding air bubbles and adding an emulsifier like xanthan gum should help.  In my dairy-based ice cream, the cream cheese takes care of this.

              I'm still having trouble with the mixture not freezing as much as I think it should in the ice cream maker.  It doesn't seem to get much colder (or incorporate more air) after the first 10 minutes.  I'm thinking I should chill the mixture in the freezer a little before putting it into the ice cream maker next time, but I'm wary of getting it too cold since I had such a bad experience trying to follow the Cook's Illustrated advice of mixing in a portion of frozen ice cream base just before churning.  (The mix was so cold that the ice cream maker seized up in the first 5 minutes and nearly broke my ice cream maker.)  My freezer is at it's lowest setting and my refrigerator is 2 degrees celsius, as recommended by Ice Cream Science, so I think the temperatures should be working, but it is pretty warm in Brooklyn today.

              ADDENDUM:

              As it turns out, my wife really likes this ice cream!  She prefers icier, less creamy ice cream.  She also likes how much chocolate flavor this has, which I agree with but I still taste the soy a lot.

              Vegan Chocolate Ice Cream Recipe

              NOTES: Here's my current recipe for future reference.  I do not recommend you make this without some tweaks like additional emulsifiers!

              Ingredients

              • 2 cups soy creamer
              • 1 cup soy milk
              • 2 tbsps arrowroot powder
              • 1/2 cup cocoa powder
              • 1 1/2 oz dark chocolate (Green & Black is vegan, if you care about that)
              • 1/2 cup sugar
              • 1/3 cup corn syrup
              • 1/2 cup strong brewed coffee
              • 1/4 tsp salt

              Instructions

              1. Mix 1/4 soy milk with arrowroot in a small bowl.
              2. Put all other ingredients in a saucepan.  Heat, stirring often, until all chocolate is melted.  Bring to a boil, then remove from heat.
              3. Pour in arrowroot mixture while whisking.  Mixture should thicken quickly.
              4. Pour mixture into a container.  Let it sit until it reaches room temperature and then put it in the refrigerator overnight.
              5. Strain mixture through fine mesh strainer and then freeze in an ice cream maker.